The Ultimate Guide to Brick Repair: Techniques, Tools, and Tips
Wiki Article
Bricks have adorned buildings, walls, walkways, and chimneys for centuries. Renowned because of their durability and classic appearance, they nevertheless succumb to weathering, shifting foundations, moisture intrusion, and general wear over time. Timely brick repair not just restores aesthetics but in addition maintains structural integrity and prevents higher priced damage as time goes on. In this article, we’ll cover common brick problems, the tools and materials you need, step-by-step repair methods, and preventive maintenance tips.
1. Why Brick Repair Matters
Structural Integrity
Cracked or missing mortar and damaged bricks allow water penetrate, freeze, and expand—worsening cracks and undermining load-bearing walls.
Aesthetic Appeal
Crumbling mortar and spalled bricks detract out of your home’s or façade’s crisp, clean look. Repair preserves entrance charm and property value.
Cost Savings
Addressing small repairs early prevents escalation into large-scale repointing or replacement projects.
2. Common Brick Problems
Spalling (Brick Face Flaking):
Caused by freeze–thaw cycles or salt intrusion; the brick surface chips away in flakes.
Cracked Bricks:
Result from settling, seismic activity, or impact damage.
Deteriorated Mortar Joints:
Old mortar can crumble (“rake out”) or wash away, leaving gaps between bricks.
Efflorescence:
White, powdery salt deposits on top indicate moisture moving through masonry.
Bulging or Bowing Walls:
Sign of moisture damage or shifting foundation; might require more extensive structural work.
3. Essential Tools & Materials
Category Tools / Materials
Mortar Work Brick trowel, pointing trowel, mortar hoe, margin trowel
Brick Replacement Cold chisel, masonry hammer, brick set, tuck-pointing tool
Safety Gloves, safety glasses, dust mask
Mortar & Fillers Pre-mixed mortar or mortar mix (match existing color), brick repair caulk/filler
Cleaning Wire brush, mortar brush, sponge, bucket of clean water
Finishing Grout bag or pointing gun, matching brick veneers (if required)
4. Step-by-Step Brick Repair Process
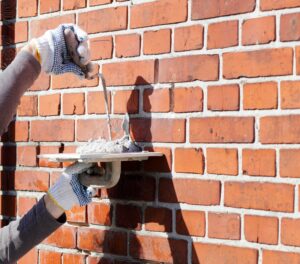
A. Repointing (Replacing Mortar Joints)
Remove Old Mortar
Use a cool chisel and masonry hammer or even an angle grinder which has a mortar-raking blade.
Clean joints to your uniform depth of around ¾" (or until sound mortar is reached).
Clean the Area
Brush out dust which has a mortar brush or wire brush.
Dampen bricks and joints lightly—surfaces must be moist and not dripping.
Prepare & Apply Mortar
Mix mortar to a stiff, peanut-butter consistency.
Fill joints using a pointing trowel or grout bag, packing mortar tightly.
Tool the Joints
Once the mortar begins to set (skin forms but nonetheless workable), tool it to fit the profile of surrounding joints (concave, flush, or vee).
Clean Up
After final set to start with full cure, brush away excess mortar with a soft brush and sponge away smears.
B. Brick Replacement
Remove Damaged Brick
Score mortar round the brick face by having an angle grinder or chisel out mortar from all of four sides.
Gently tap the brick to loosen and extract it.
Clean Cavity
Clear out debris and old mortar. Dampen the cavity.
Set New Brick
Butter the edges and bottom in the new brick with mortar.
Press into place, ensuring it aligns flush with adjacent bricks.
Fill Joints
Point mortar throughout the new brick as described above.
Finishing Touches
Tool and clean joints. Allow mortar to cure per manufacturer’s directions (typically 24–48 hours).
C. Repairing Spalled Bricks
Assess Severity
For minor surface flaking, a polymer-modified brick repair compound may suffice.
For deep spalls or widespread damage, consider full brick replacement.
Apply Repair Compound
Mix per instructions and apply with a trowel to fill pits and chips.
Shape and smooth to match original brick face.
Color Matching
Tint repair compound to combine seamlessly with surrounding brick.
5. Preventive Maintenance
Sealants & Water Repellents:
Apply a breathable masonry sealer every 3–5 years to limit moisture ingress while allowing trapped water vapor to flee.
Proper Drainage:
Keep gutters, downspouts, and grading who is fit to divert water from brick walls and foundations.
Inspect Regularly:
Check for hairline cracks, detached mortar, and efflorescence twice a year—especially after winter.
Vegetation Control:
Trim vines and remove plants growing against brickwork; roots and vines can trap moisture and pry mortar loose.
6. Safety Considerations
Always wear eye protection, gloves, and a dust mask when chiseling or grinding mortar.
Be cautious implementing ladders or scaffolding—brick repair often occurs above walk-out.
If the structure is older (pre-1978), test for lead paint and handle in accordance with safety guidelines.
Brick repair—whether simple repointing, spall remediation, or full mailbox repair — can be tackled successfully with all the right preparation, tools, and techniques. Prompt focus on minor damage prevents costly structural issues, preserves your property’s beauty, and extends the life span of your masonry. By following the methods outlined here and performing regular inspections, you’ll maintain brickwork looking strong and attractive for many years.